⚙️Maintenance Admin :
1. Employee Profile
2. Equipment Report
3. Create Equipment Report
4. Create Site Report
5. Create Delivery Notes Report
6. View Delivery Notes Report
7. View Site Report
8. View Site Dispatch
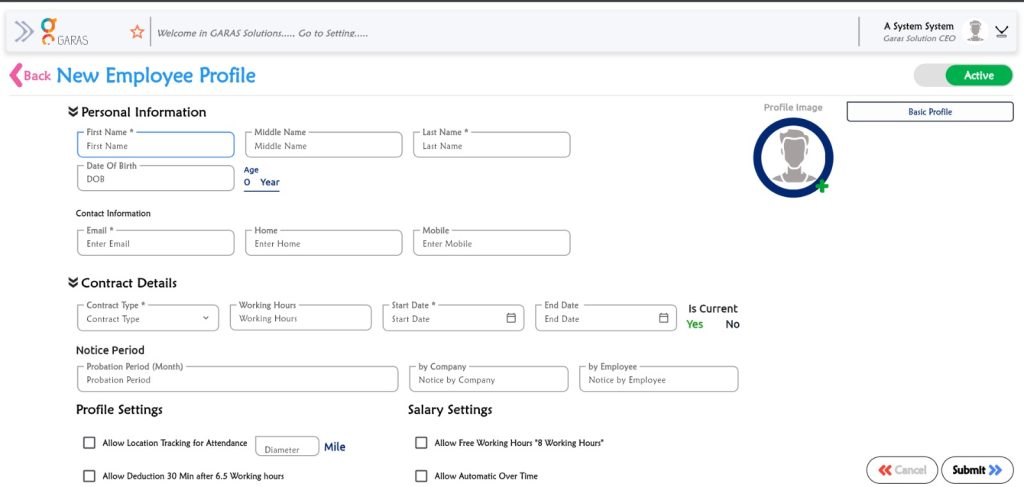
Phase 1: Creating the New Employee Profile (Image 2 – The Form)
These steps use the screen with the data entry form:
Personal Information:
Enter the First Name* (required).
Enter the Middle Name and Last Name.
Enter the Date Of Birth (DOB). The Age will be calculated automatically.
Contact Information:
Enter the Email.
Enter the Home phone number.
Enter the Mobile phone number.
Contract Details:
Select the Contract Type.
Enter the Working Hours.
Select the Start Date and End Date.
Indicate whether the contract Is Current.
Notice Period:
Enter the Probation Period (in months).
Enter the notice period required by Company.
Enter the notice period required by Employee.
Profile and Salary Settings (Checkboxes):
Check or uncheck the options to:
Allow Location Tracking for Attendance.
Allow Deduction 30 min after 6.5 Working hours.
Allow Free Working Hours (8 Working Hours).
Allow Automatic Over Time.
Finalize and Submit:
Ensure the Active button (top right) is set correctly.
Click the Submit >> button to save the new employee profile.
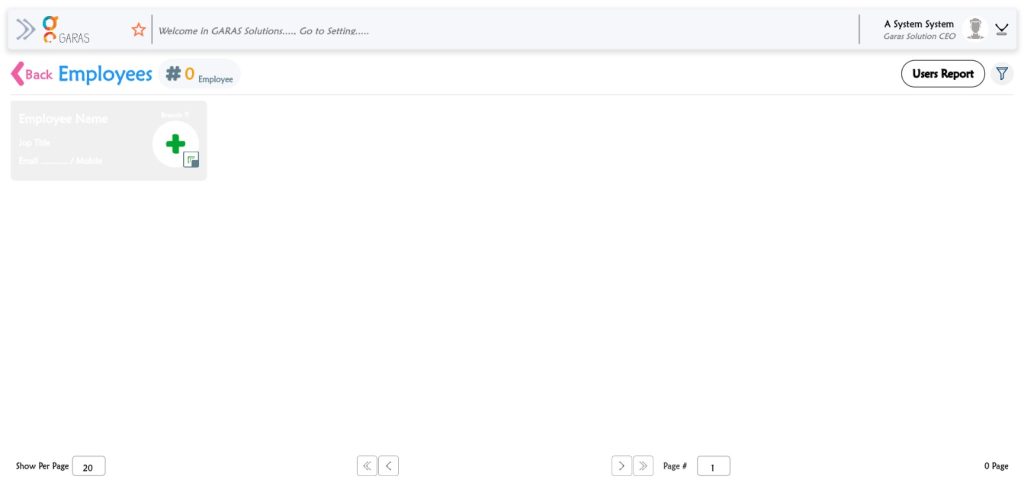
Phase 2: Viewing the Employee List (Image 1 – The Dashboard)
Once the profile is submitted, you return to the main employee management screen:
Return to List: You will be returned to the main Employees list screen.
Verify Count: The employee count next to the # Employee icon should update to include the newly added profile.
Review and Reporting: From this screen, you can:
Click Users Report to generate a report.
Use the Filter (funnel icon) to search or sort the employee list.
To add another employee, click the green Add (+) icon to open a new profile form.